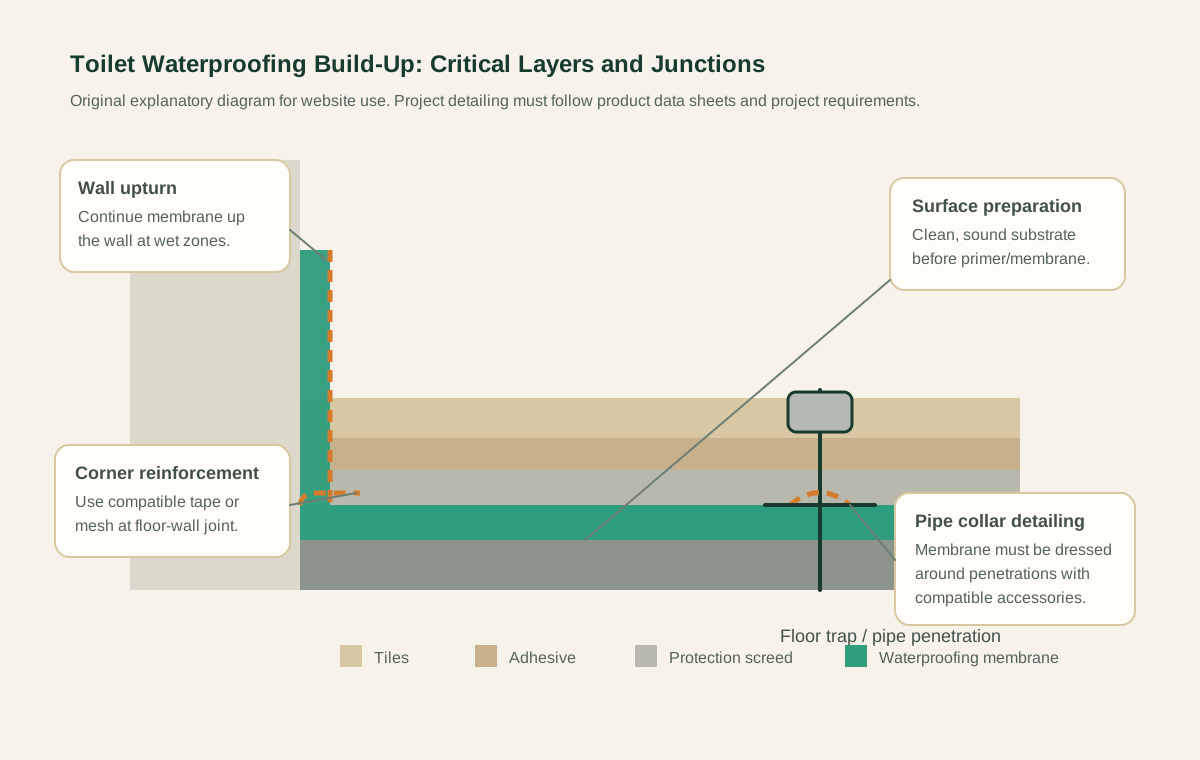
Every membrane brochure claims to be the best. The honest data is in the technical data sheet, the third-party test certificates, and the way the membrane behaves on a real bathroom floor. These are the qualities that actually matter when the membrane is asked to perform under tile, screed and a daily shower.
1. Adhesion to the substrate
A membrane only works if it bonds to what it sits on. Adhesion data should be quoted in N/mm² after both wet and dry curing, on the substrate that will actually be on the job — usually cement screed for floors and rendered masonry for walls. Pre-mixed acrylic systems often quote dry-condition adhesion only; ask for wet adhesion before specifying.
2. Elongation at break
A bathroom floor flexes under thermal cycling, foot traffic and minor structural movement. The membrane has to stretch with the substrate. Elongation at break is the percentage stretch the cured film can take before tearing. Cementitious membranes typically run 5 to 40%; flexible polymer-modified systems 80 to 150%; acrylic and PU systems 200 to 400%. The number alone is not enough — read the test temperature and the conditioning regime.
3. Water immersion and re-wetting behaviour
A toilet floor is wet for years, not for an afternoon. The right test is long-term water immersion — typically 28 days minimum. The membrane should not soften, swell, peel or lose adhesion. Re-wetting behaviour matters even more for outdoor or roof products; for indoor toilets, sustained immersion is the test that counts.
4. Crack bridging
Hairline cracking in the screed is normal. The membrane has to bridge those cracks without tearing. Crack-bridging classification under EN 14891 or the equivalent regional standard is a useful comparison; in plain language, look for "A" or higher.
5. Compatibility with screed and tile adhesive
After the membrane cures, a screed protection layer is poured and tiling proceeds on top. The membrane has to bond to the screed and the screed has to bond to the tile adhesive. Some PU membranes need a broadcast of quartz sand into the wet top coat to give the screed something to key into. Skipping that step is the most common cause of "the tiles came up but the membrane stayed down".
6. Pipe collar and floor trap detailing
The membrane is only as strong as its detail at the pipe collar and floor trap. A flat-applied membrane over a pipe stub is a leak waiting to happen. Use a collar piece — heat-shrink, fabric or proprietary — bedded into the wet membrane, then second coat overlapped. Same principle at the floor trap upstand. Detailing is half the job.
7. Compliance reference
The reference framework for product selection is SS 637:2018 and the BCA Waterproofing for Internal Wet Areas enhancement series. For wet areas in projects pursuing CONQUAS or Quality Mark, the system should be from a recognised list and be supported by current third-party test data, not just an internal lab report.